facebook instagram pinterest shop

Prairie Quilt Co.

Modern Quilt Designs

  • Home
  • About
  • Free Pattern Library
  • Shop
  • Newsletter

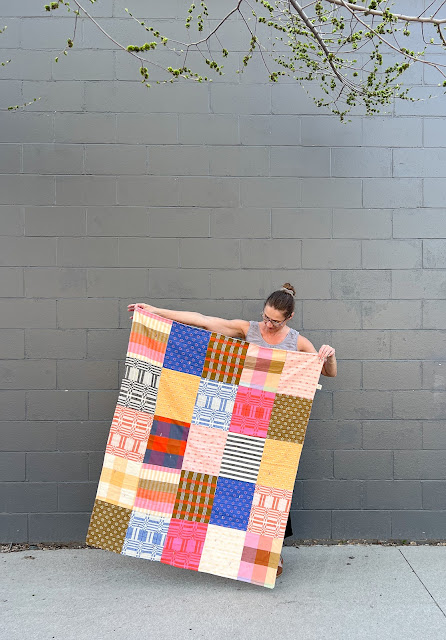
A quilt in two hours?? Yes, it can be done!

I planned this quilt as a beginner project for a kid's (Grades 4-6) quilt workshop at my school - knowing the skill level and time constraints, I wanted something simple and practical for beginners to accomplish, with it still being a good size for snuggling with!

I also see this being a great tutorial for quick baby and toddler gifts, who doesn't love that? 
The quilt finishes at 42" x 52".

Now, I was in a hurry when making this project, so I did not take a lot of photos, but hopefully what I do have will work!


Fabric Requirements:

(25) 9" x 11" rectangles (I cut assorted pieces from a Fableism Swedish Holiday FQ bundle)
(1) piece of batting the same size as your quilt top
1 1/2" yards backing fabric


Sewing the quilt top:

1) Sew (5) rectangles right sides together along the long edge to form a row
2) Repeat to make (5) rows
3) Press row seams in alternating directions so that they will nest
4) Sew rows together, nesting seams
5) Press seams open

Okay - so the cutting and sewing of the quilt top took me one hour to complete - crazy, right?
Next, the basting, backing and finishing took one additional hour. A two-hour quilt!

I chose to finish the quilt without binding to keep it simple, however, if you have the know-how to baste, quilt and bind the traditional way, go for it! Be aware that it may take more than two hours to finish in this case.


How to finish a quilt without binding:
I followed a great tutorial from Quilts with Jen (it has a ton of photos if you need them!)

Here's what I did - 
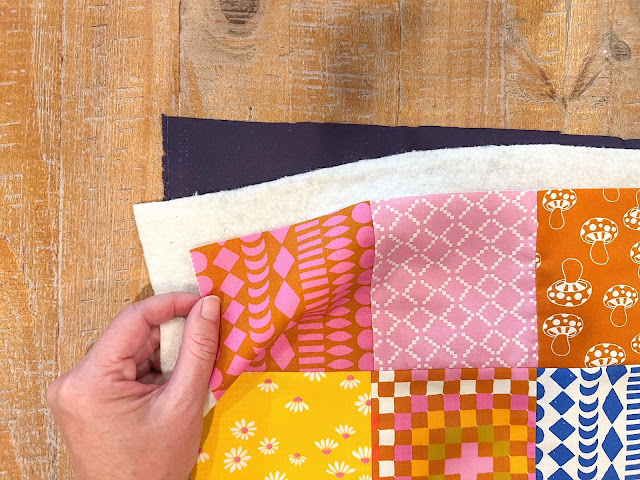
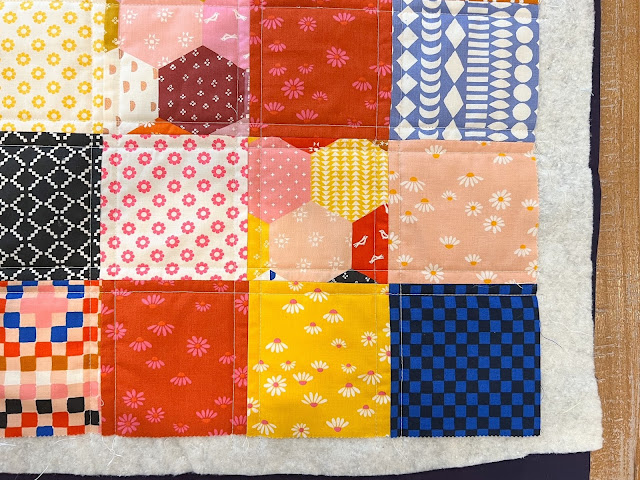
1) Spray baste the top to the batting - trim the batting to be the exact size of the top.
2) Lay the backing RIGHT SIDES TOGETHER to the quilt top - trim the backing to the exact size.
3) Pin, pin, pin in place so that the backing doesn't slip when you're sewing.
4) Sew a 1/2" seam all away around the edge of the quilt, leaving a gap large enough to turn it right side out.
5) Turn quilt right side out by sticking your arm through the gap and gently pulling it through.
5) Press, making sure that the edges are even.
6) Sew the gap closed by machine or hand.
7) Top stitch 1/2" from the edge all the way around the quilt.

And you're almost done!
I added a cute Sarah Hearts tag to my quilt as I was sewing the backing on - it's the details!!


The last thing you need to do if you are not quilting is to add tacking or ties to the quilt so that the layers don't bunch up over time. Let's keep them in place!

You could hand tie the quilt, but I wanted something easier and faster for my workshop, so I chose a machine tacking method - it's super fast and easy!

To machine tack:
1) Set your machine to zig-zag stitch
2) Shorten the stitch length to 1.5-2.0
3) Stitch about 1/2-1", backstitch the same amount, then forward stitch again
4) Set your stitch (locking/fixing, or tie thread)
5) Move to a new spot and repeat!

I placed two tacks on each block - this way they are spaced pretty evenly as per the batting recommendations. 


And there you have it!
A quilt in two hours, ready for snuggles!


Save this post to Pinterest for future reference!

Share
Tweet
Pin
Share
No comments


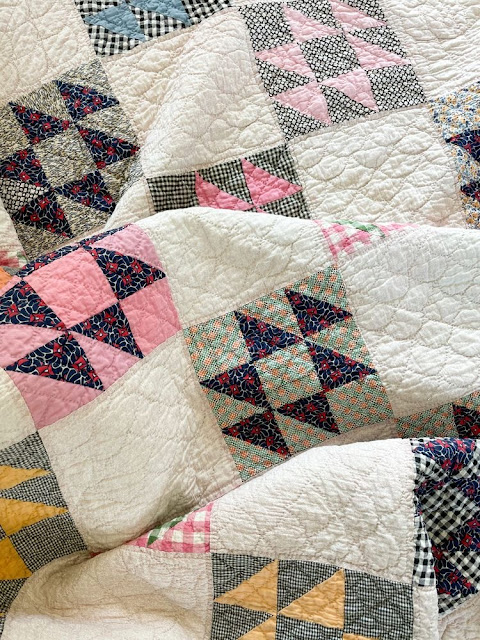
My "Old Maid Summer" stash-busting quilt top is complete!

I used my free Old Maid's Puzzle block pattern to sew up 64 scrappy blocks using 64 different fabrics from my stash - it was so fun to just use what I had!

The quilt is wonderfully busy and scrappy - just the thing I want in a scrap quilt! I can see this one being well snuggled with on future camping trips!


Do you want to make a quilt like this?

Here's what I did broken down into steps:

1. Make 64 Old Maid's Puzzle blocks using scraps - pair a light and a dark fabric for best results!

2. Create groups of four blocks - rotate the blocks so that they form a star as shown below and sew together. You will be able to make 16 blocks like this.


3. Layout your blocks in a 4 x 4 grid.

4. Add sashing if you like - not everyone likes it, but I wanted a bit of definition between the blocks. I decided to add skinny light grey sashing strips - I cut the strips to be 1.5" wide and added them between each block and between the rows.


5. And your quilt top is complete!
This layout finishes at 63" x 63"

Another idea I found on Pinterest for laying out Old Maid's Puzzle blocks is this:

Image: Pinterest

I looooove this layout too with the alternating white blocks - I think might make one like this too for the back of the quilt! It's another great option for this block!


If you would like the FREE Old Maid's Puzzle block sent to your inbox, you can request it at the link here!

Happy Scrappy Sewing!
Share
Tweet
Pin
Share
1 comments


I'm excited to share a new free pattern for my followers!

With Valentine's Day fast approaching, I decided to design a paper pieced heart on a whim one January Sunday afternoon - what better way to spend a cold winter day?

Download your pattern HERE.


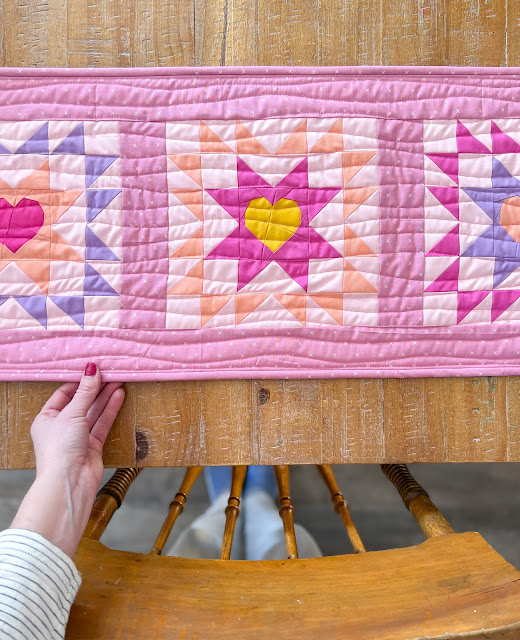
The pattern is called the Simple Heart FPP block - mainly because it is just a simple heart! I created templates in three different sizes - 3", 6" and 9" - to allow for all kinds of sewing creativity!

This pattern is great for those new to FPP since it doesn't have a lot of pieces and isn't too fussy. It's a great way to use up scrap fabric and to show off your favourite prints!

I'll be hosting an Instagram Live demonstration on this block on Saturday, February 4th 2023. If you can't catch the live I'll be saving it into my profile for you to watch later!


Most of the fun is deciding what to make with these hearts! The sizes are common - so they could fit into many different projects. I've included a long list of ideas in the pattern to get you started!


The smallest hearts fit perfectly into my Cabin Nights sawtooth star block. I made three stars, and added the extra bear paw points. The stars then fit perfectly into my Starry Night Table Runner Pattern! What serendipity!


The 9" heart also would fit into the Starry Night Table Runner pattern on its own, or use it in Cabin Nights to replace the middle star and points completely! I just added the log cabin strips to the 9" heart, adding one extra round to make the block 18.5 inches. It made the perfect throw pillow cover!


There are so many creative ways to use your Simple Heart block! Tag me with #simpleheartfppblock and #prairiequiltcopatterns so I can see what you make!

Download your free Simple Heart FPP block pattern HERE.

Share
Tweet
Pin
Share
No comments

Hey everyone!

Last month I had the privilege of leading a sewing mini course for a group of 8 year old girls at the school where I teach. Over five weeks we learned how to design, sew and quilt a patchwork pillow. It was so much fun and I promised that I would write up a free tutorial on how to make a pillow just like we did in the class!

This is a perfect beginner project since it only uses squares and basic sewing skills and tools.

If you would prefer a printable PDF copy of this tutorial, I have one available here.

Here we go!

First off, some pattern notes to keep in mind:
  • Read all instructions before beginning
  • Skill Level = Beginner
  • RST = right sides together
  • All seams are 1/4" unless otherwise noted
  • The sample pillow in this tutorial uses a charm pack of 'Honey' fabric by Ruby Star Society
You'll need to gather the following materials:
  • (25) x 4 1/2" squares fabric for pillow front - this is a great project to use up scraps or pre-cuts!
  • 1 piece batting measuring 22" x 22"
  • 1 piece fabric measuring 22" x 22" - this will end up on the inside of the pillow - good options would be to use scrap fabric, thrifted fabric, or inexpensive muslin
  • 1/2 yard fabric for back of pillow - cut (2) 15" x 20 1/2" pieces
  • 20" x 20" pillow insert
You will also need some basic sewing supplies:
  • Sewing machine
  • Rotary cutter and mat
  • Rulers - I use a 6 1/2" square and a 6 1/2" x 24"
  • Iron and ironing board or wool mat
  • Fabric scissors
  • Pins
Are you ready? It's time to get started!

A little bonus to compliment the tutorial - because sometimes written instructions are just a little too abstract for those just starting out - so for those of you who learn better from being shown how to do something, I filmed some of the more tricky steps and put them together into a video that can be viewed here.


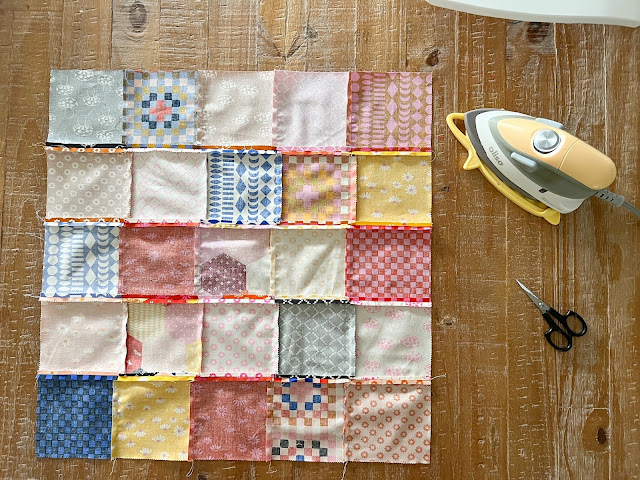
Step 1 - Decide on a layout for your pillow. Lay your (25) 4 1/2" squares out in a 5 x 5 grid the way that you want them sewn together. There are many ways to arrange your fabric pieces, and you can even use grid paper to colour designs before you get started.


Step 2 - Sew squares into rows of 5. Press seams to the side, alternating the direction with each row so that seams will nest when you sew the rows together.


Step 3 - Sew rows together. Use pins to help match the seams. Press seams open.


Step 4 - Baste your pillow top. Layer your pillow backing fabric right side down (this is the scrap piece that will not be seen), then your batting layer, and finally your pillow top right side up. Use spray baste or pins to baste in place.


Step 5 - Quilt your pillow top as desired. I quilted straight lines by following the edges of the squares with my presser foot. This is a quick and easy way to quilt without having to mark extra lines. If you have a walking foot it is helpful to feed the layers through your machine evenly.


Step 6 - Trim excess batting and backing fabric from pillow top.


Step 7 - Prepare the envelope back for pillow. Take the (2) 15" x 20 1/2" fabric pieces for the pillow back. Fold the long edge of the fabric over 1/2" and press. Fold over again and press. Repeat for other piece of fabric. Top stitch folded edge down on both pieces.

Step 8 - Place pillow top right side up. Lay envelope back pieces right side down on top of the pillow top. Make sure the stitched, folded edges are facing to the middle and all the edges are lined up with the pillow top. The back pieces will overlap by several inches. Pin in place all around the pillow.


Step 9 -Sew all around the perimeter of the pillow. I like to reinforce the envelope opening by sewing back and forth over the openings several times. Use a scissor to carefully cut the corners away without cutting into your stitches. Turn pillow right side out and stuff with a 20" x 20" pillow insert. You're all done!


Please share your makes using the hashtag #prairiequiltcopatterns and #patchworkpillow

If you would like a printable PDF copy of this tutorial, you can download one here!


Share
Tweet
Pin
Share
No comments
Older Posts

About me

Amanda

Quilt maker and pattern designer based in Southern Manitoba

Follow Us

  • facebook
  • pinterest
  • instagram

Labels

  • free quilt pattern
  • quilt pattern
  • quilting
  • tutorial

Recent Posts

Search This Blog

Blog Archive

  • May 2025 (1)
  • March 2025 (3)
  • November 2024 (2)
  • October 2024 (5)
  • January 2024 (2)
  • September 2023 (2)
  • July 2023 (7)
  • January 2023 (1)
  • December 2022 (7)
  • July 2022 (7)
Facebook Instagram Pinterest Shop

Created with by BeautyTemplates