Patchwork Pillow Tutorial
Last month I had the privilege of leading a sewing mini course for a group of 8 year old girls at the school where I teach. Over five weeks we learned how to design, sew and quilt a patchwork pillow. It was so much fun and I promised that I would write up a free tutorial on how to make a pillow just like we did in the class!
This is a perfect beginner project since it only uses squares and basic sewing skills and tools.
If you would prefer a printable PDF copy of this tutorial, I have one available here.
Here we go!
First off, some pattern notes to keep in mind:
- Read all instructions before beginning
- Skill Level = Beginner
- RST = right sides together
- All seams are 1/4" unless otherwise noted
- The sample pillow in this tutorial uses a charm pack of 'Honey' fabric by Ruby Star Society
- (25) x 4 1/2" squares fabric for pillow front - this is a great project to use up scraps or pre-cuts!
- 1 piece batting measuring 22" x 22"
- 1 piece fabric measuring 22" x 22" - this will end up on the inside of the pillow - good options would be to use scrap fabric, thrifted fabric, or inexpensive muslin
- 1/2 yard fabric for back of pillow - cut (2) 15" x 20 1/2" pieces
- 20" x 20" pillow insert
- Sewing machine
- Rotary cutter and mat
- Rulers - I use a 6 1/2" square and a 6 1/2" x 24"
- Iron and ironing board or wool mat
- Fabric scissors
- Pins
A little bonus to compliment the tutorial - because sometimes written instructions are just a little too abstract for those just starting out - so for those of you who learn better from being shown how to do something, I filmed some of the more tricky steps and put them together into a video that can be viewed here.
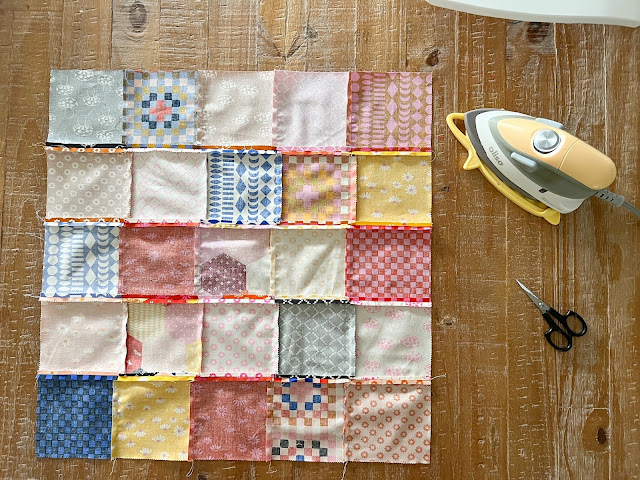
Step 1 - Decide on a layout for your pillow. Lay your (25) 4 1/2" squares out in a 5 x 5 grid the way that you want them sewn together. There are many ways to arrange your fabric pieces, and you can even use grid paper to colour designs before you get started.
Step 2 - Sew squares into rows of 5. Press seams to the side, alternating the direction with each row so that seams will nest when you sew the rows together.
Step 3 - Sew rows together. Use pins to help match the seams. Press seams open.
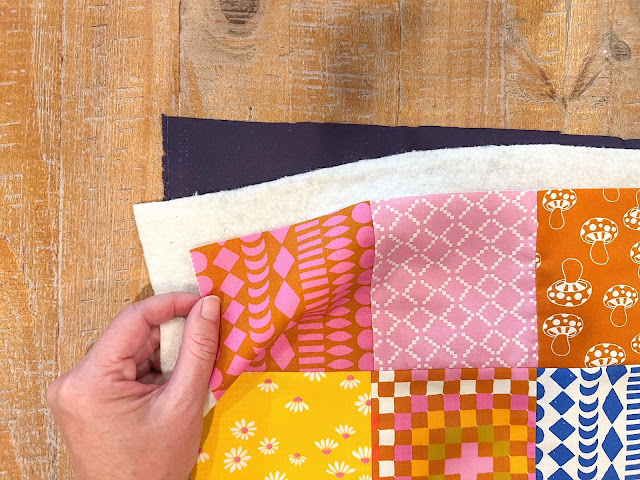
Step 4 - Baste your pillow top. Layer your pillow backing fabric right side down (this is the scrap piece that will not be seen), then your batting layer, and finally your pillow top right side up. Use spray baste or pins to baste in place.
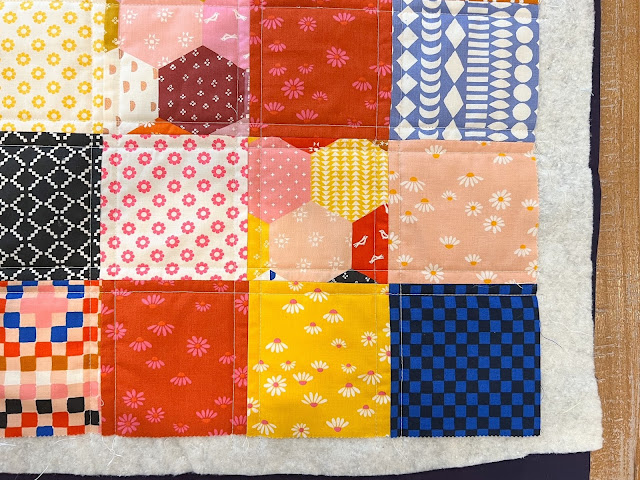
Step 5 - Quilt your pillow top as desired. I quilted straight lines by following the edges of the squares with my presser foot. This is a quick and easy way to quilt without having to mark extra lines. If you have a walking foot it is helpful to feed the layers through your machine evenly.
Step 6 - Trim excess batting and backing fabric from pillow top.
Step 7 - Prepare the envelope back for pillow. Take the (2) 15" x 20 1/2" fabric pieces for the pillow back. Fold the long edge of the fabric over 1/2" and press. Fold over again and press. Repeat for other piece of fabric. Top stitch folded edge down on both pieces.
Step 8 - Place pillow top right side up. Lay envelope back pieces right side down on top of the pillow top. Make sure the stitched, folded edges are facing to the middle and all the edges are lined up with the pillow top. The back pieces will overlap by several inches. Pin in place all around the pillow.

Step 9 -Sew all around the perimeter of the pillow. I like to reinforce the envelope opening by sewing back and forth over the openings several times. Use a scissor to carefully cut the corners away without cutting into your stitches. Turn pillow right side out and stuff with a 20" x 20" pillow insert. You're all done!
Please share your makes using the hashtag #prairiequiltcopatterns and #patchworkpillow
If you would like a printable PDF copy of this tutorial, you can download one here!
.jpg)


0 comments