facebook instagram pinterest shop

Prairie Quilt Co.

Modern Quilt Designs

  • Home
  • About
  • Free Pattern Library
  • Shop
  • Newsletter

A quilt in two hours?? Yes, it can be done!

I planned this quilt as a beginner project for a kid's (Grades 4-6) quilt workshop at my school - knowing the skill level and time constraints, I wanted something simple and practical for beginners to accomplish, with it still being a good size for snuggling with!

I also see this being a great tutorial for quick baby and toddler gifts, who doesn't love that? 
The quilt finishes at 42" x 52".

Now, I was in a hurry when making this project, so I did not take a lot of photos, but hopefully what I do have will work!


Fabric Requirements:

(25) 9" x 11" rectangles (I cut assorted pieces from a Fableism Swedish Holiday FQ bundle)
(1) piece of batting the same size as your quilt top
1 1/2" yards backing fabric


Sewing the quilt top:

1) Sew (5) rectangles right sides together along the long edge to form a row
2) Repeat to make (5) rows
3) Press row seams in alternating directions so that they will nest
4) Sew rows together, nesting seams
5) Press seams open

Okay - so the cutting and sewing of the quilt top took me one hour to complete - crazy, right?
Next, the basting, backing and finishing took one additional hour. A two-hour quilt!

I chose to finish the quilt without binding to keep it simple, however, if you have the know-how to baste, quilt and bind the traditional way, go for it! Be aware that it may take more than two hours to finish in this case.


How to finish a quilt without binding:
I followed a great tutorial from Quilts with Jen (it has a ton of photos if you need them!)

Here's what I did - 
1) Spray baste the top to the batting - trim the batting to be the exact size of the top.
2) Lay the backing RIGHT SIDES TOGETHER to the quilt top - trim the backing to the exact size.
3) Pin, pin, pin in place so that the backing doesn't slip when you're sewing.
4) Sew a 1/2" seam all away around the edge of the quilt, leaving a gap large enough to turn it right side out.
5) Turn quilt right side out by sticking your arm through the gap and gently pulling it through.
5) Press, making sure that the edges are even.
6) Sew the gap closed by machine or hand.
7) Top stitch 1/2" from the edge all the way around the quilt.

And you're almost done!
I added a cute Sarah Hearts tag to my quilt as I was sewing the backing on - it's the details!!


The last thing you need to do if you are not quilting is to add tacking or ties to the quilt so that the layers don't bunch up over time. Let's keep them in place!

You could hand tie the quilt, but I wanted something easier and faster for my workshop, so I chose a machine tacking method - it's super fast and easy!

To machine tack:
1) Set your machine to zig-zag stitch
2) Shorten the stitch length to 1.5-2.0
3) Stitch about 1/2-1", backstitch the same amount, then forward stitch again
4) Set your stitch (locking/fixing, or tie thread)
5) Move to a new spot and repeat!

I placed two tacks on each block - this way they are spaced pretty evenly as per the batting recommendations. 


And there you have it!
A quilt in two hours, ready for snuggles!


Save this post to Pinterest for future reference!

Share
Tweet
Pin
Share
No comments


Fall is one of my most favourite seasons of the year.

Why? 

Cozy weather, perfect for snuggling under quilts, changing colours, crisp walks, candlelight dinners are back, my birthday, pumpkins, apples, gratitude, back to school, and the slow-down before the holidays.

I've been wanting to make a maple leaf quilt project for my fall decor, and this a was the year to do it!

Download your free maple leaf block here
The block finishes at 9"


I made my maple leaf blocks extra scrappy with Ruby Star Society and Art Gallery Fabrics scraps from my stash. I chose to make a total of four blocks to become a table runner.

I used a Robert Kaufman chambray that I had on hand for background.


The pattern includes basic instructions for finishing your blocks as a table runner with 2.5" sashing and borders. I quilted my runner with a mixture of machine and hand quilted maple leaf details using Aurifil thread.


Grab your free maple leaf quilt block pattern here!

Share
Tweet
Pin
Share
No comments


Remember those twenty scrappy Granny Square blocks I made using my free quilt block pattern?

I sewed them together into the prettiest throw quilt!


I cut sashing pieces at 1.5" x 11.75" to finish at 1" wide.
Cornerstones were cut at 1.5" square to finish at 1" square.


The quilt top measures 50" x 62" - the perfect small throw!


I machine quilted the top using my signature organic wavy line quilting.
I had just enough of this widleback strawberry print from Windham Fabrics to finish this one - it's just perfect!


A fun black and white print for binding was the perfect finish for this scrappy Granny Square quilt. 
I love how it turned out so much!

Want to make one? Download the free Granny Square block pattern here!


Share
Tweet
Pin
Share
1 comments


It's Granny Season over here!

Every summer I love making a traditional quilt pattern that uses up my fabric stash.

This summer I decided it would be the traditional Granny Square block, and I wrote up the instructions in a free downloadable pattern, just for you!

Download your copy here!


I pulled a huge number of scraps from my stash and made twenty unique blocks - but I left the outer squares the same on all of them for a bit of cohesion. 

I used Ruby Star Society speckled in peony for all of the outer squares.


These blocks whip up really fast, and are a little addictive to make!


Download your free Granny Square pattern here!


Share
Tweet
Pin
Share
1 comments


My "Old Maid Summer" stash-busting quilt top is complete!

I used my free Old Maid's Puzzle block pattern to sew up 64 scrappy blocks using 64 different fabrics from my stash - it was so fun to just use what I had!

The quilt is wonderfully busy and scrappy - just the thing I want in a scrap quilt! I can see this one being well snuggled with on future camping trips!


Do you want to make a quilt like this?

Here's what I did broken down into steps:

1. Make 64 Old Maid's Puzzle blocks using scraps - pair a light and a dark fabric for best results!

2. Create groups of four blocks - rotate the blocks so that they form a star as shown below and sew together. You will be able to make 16 blocks like this.


3. Layout your blocks in a 4 x 4 grid.

4. Add sashing if you like - not everyone likes it, but I wanted a bit of definition between the blocks. I decided to add skinny light grey sashing strips - I cut the strips to be 1.5" wide and added them between each block and between the rows.


5. And your quilt top is complete!
This layout finishes at 63" x 63"

Another idea I found on Pinterest for laying out Old Maid's Puzzle blocks is this:

Image: Pinterest

I looooove this layout too with the alternating white blocks - I think might make one like this too for the back of the quilt! It's another great option for this block!


If you would like the FREE Old Maid's Puzzle block sent to your inbox, you can request it at the link here!

Happy Scrappy Sewing!
Share
Tweet
Pin
Share
1 comments


You've heard of "hot girl summer"?

Well, I'm planning on having an "old maid summer"!

I've been wanting a new project for using up my stash, and I decided to make piles of these simple nine-patch Old Maid's Puzzle blocks from my scraps!

Click here for the free block pattern.


I've pulled a HUGE amount of fabrics out of my stash and I'm using them ALL!

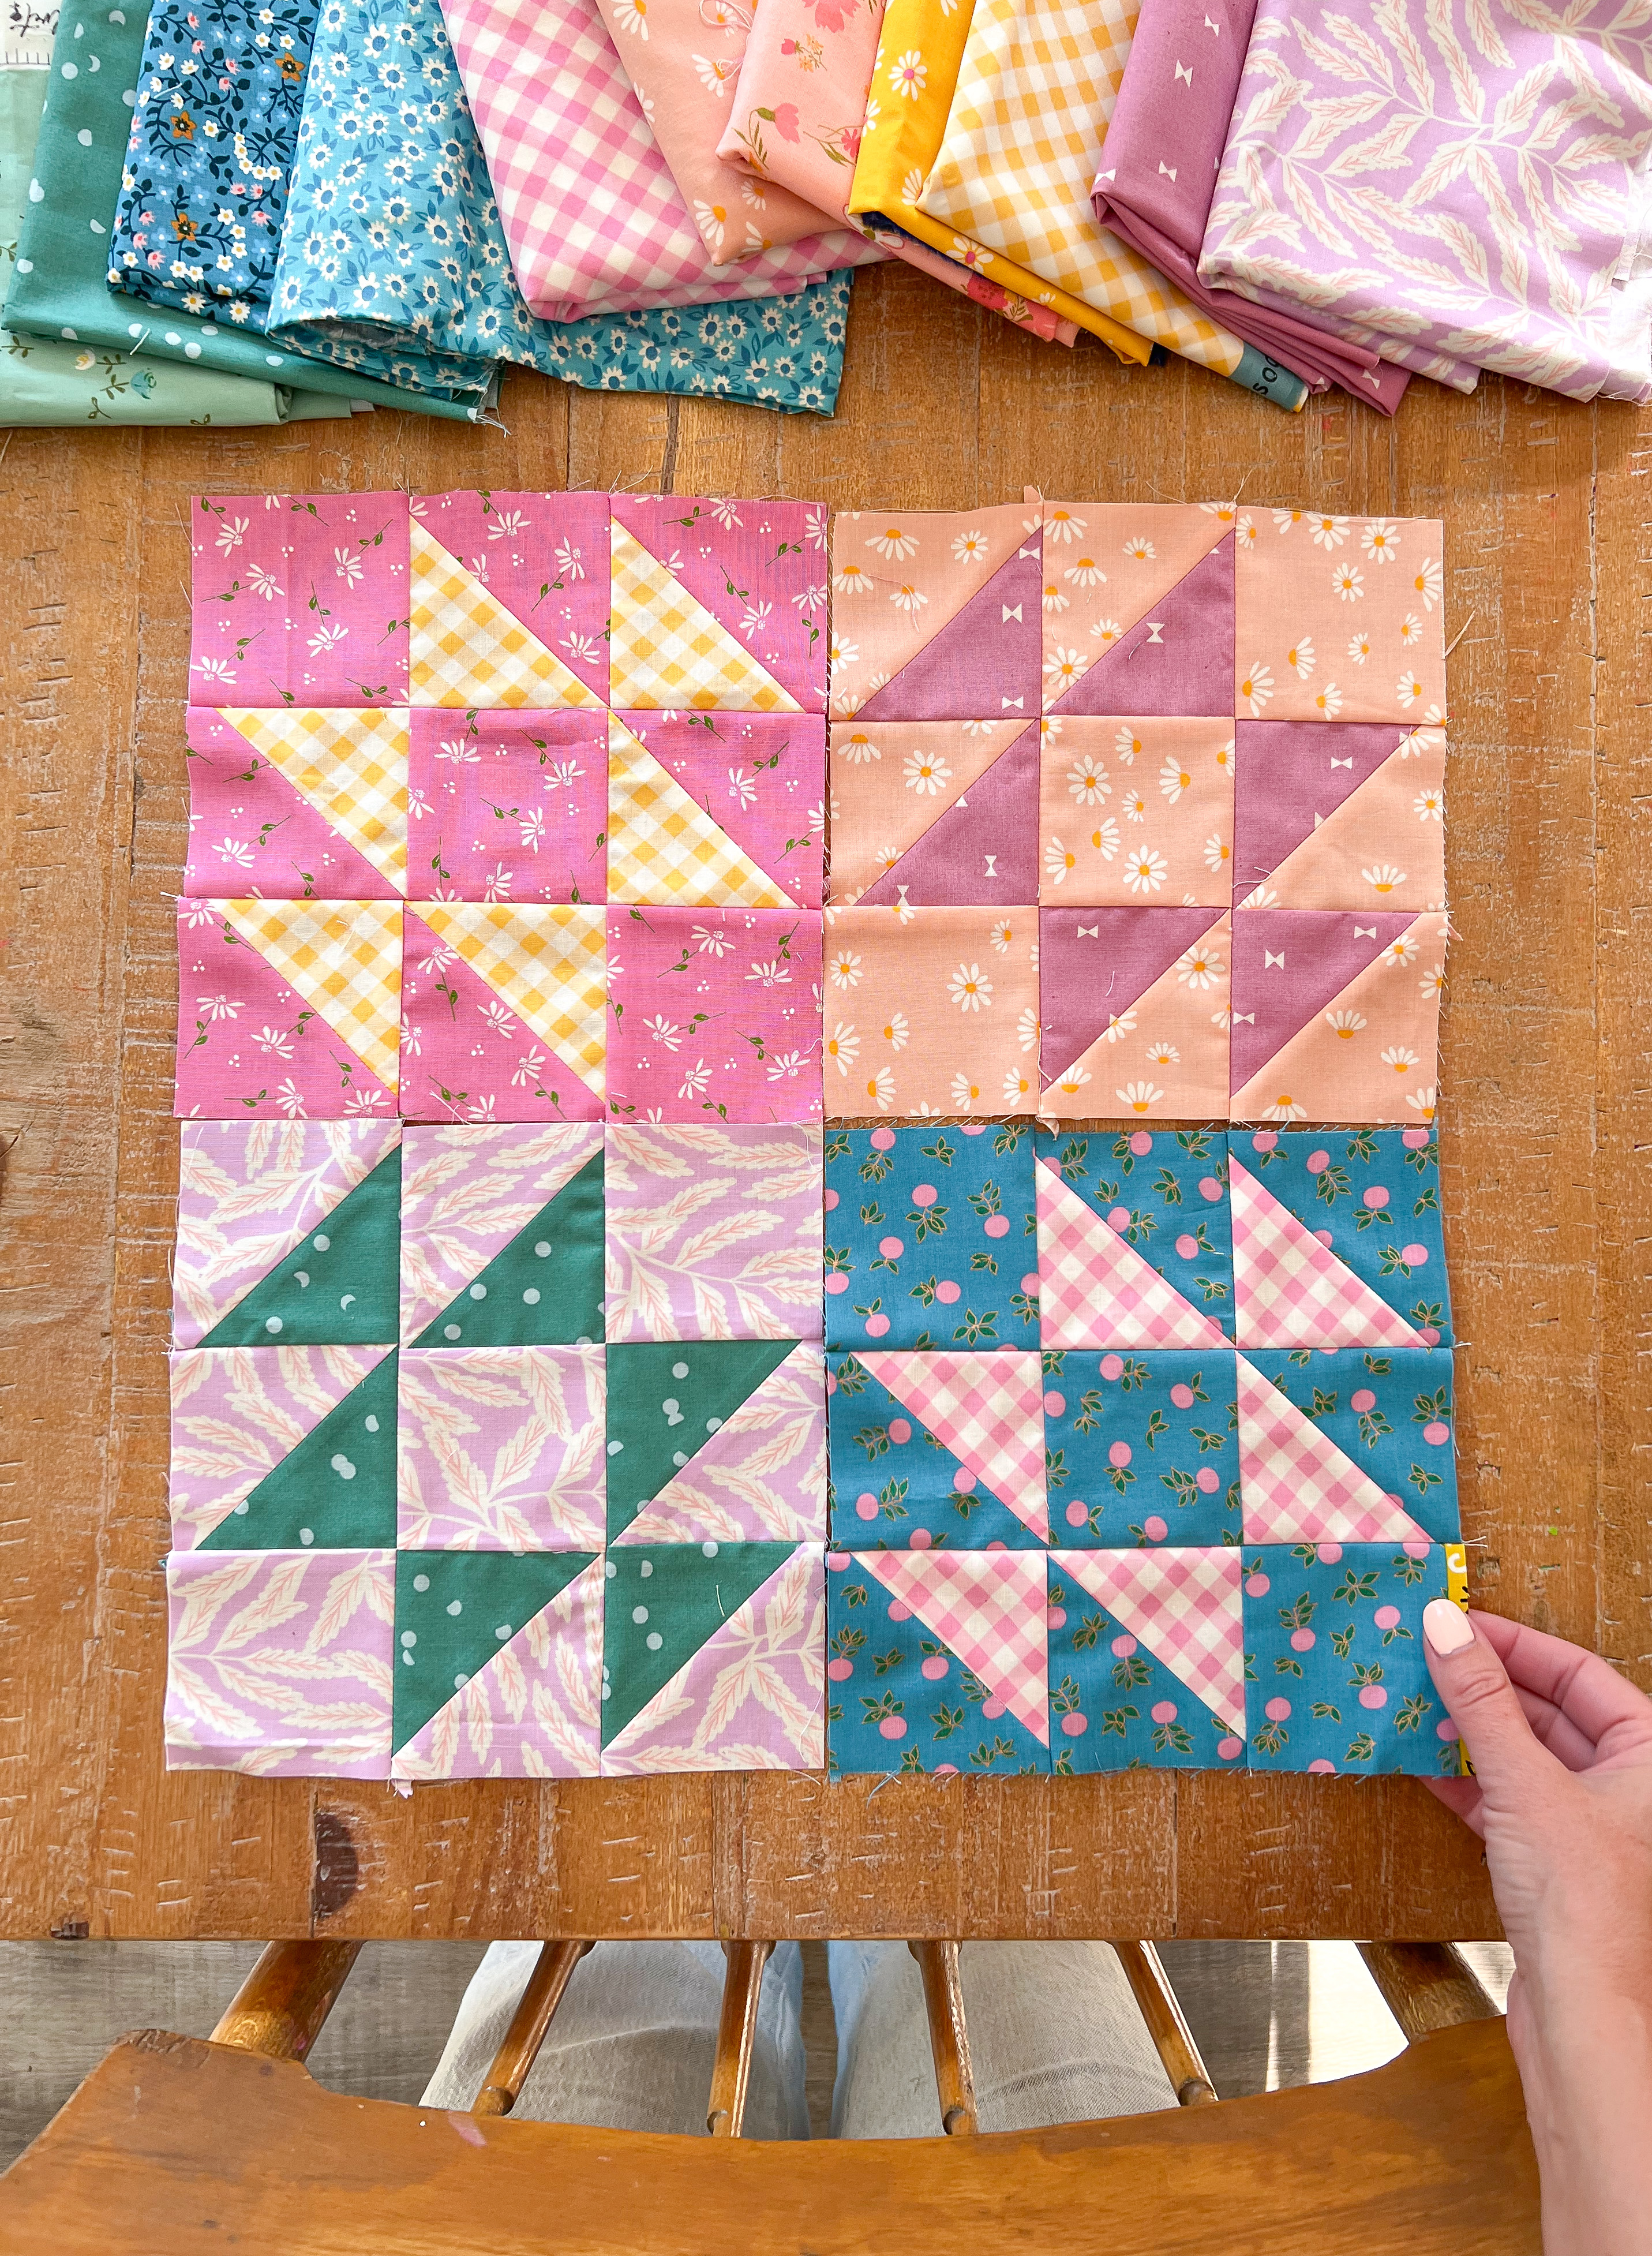
My plan is to make 64 different combinations of Old Maid blocks and then pair them up into groups of four, kind of like this....


This will make 16 blocks that look like scrappy stars!

Stay tuned for the finished project soon!

Do you want to make a scrappy Old Maid's Puzzle quilt too?
You're in luck! I wrote out the instructions to make this easy nine patch block as a free block pattern!

Fill out the form here to have the PDF pattern sent straight to your email!


Share
Tweet
Pin
Share
No comments
Older Posts

About me

Amanda

Quilt maker and pattern designer based in Southern Manitoba

Follow Us

  • facebook
  • pinterest
  • instagram

Labels

  • free quilt pattern
  • quilt pattern
  • quilting
  • tutorial

Recent Posts

Search This Blog

Blog Archive

  • May 2025 (1)
  • March 2025 (3)
  • November 2024 (2)
  • October 2024 (5)
  • January 2024 (2)
  • September 2023 (2)
  • July 2023 (7)
  • January 2023 (1)
  • December 2022 (7)
  • July 2022 (7)
Facebook Instagram Pinterest Shop

Created with by BeautyTemplates